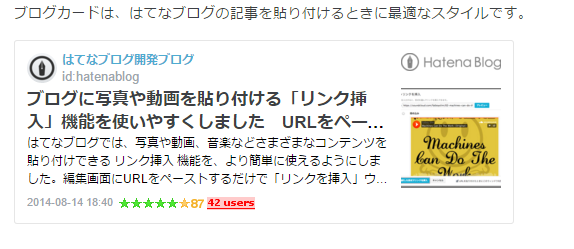
昨今、ShereHTMLでのリンク作成がここ数年メジャーでしたが、
WordPressやはてなブログにおいてはブログカードなるものが出てきました。
サイト内リンクや外部サイトリンクのサイトがカードみたいに表示されるものです。
私もWordPressをやるまでは知りませんでしたが、
いざ新しいものに手を出すと…。
なんとなくやってみたくなるのもわかる気がします。
これまでは、
Stinger6 Stinger7 WordPress カスタマイズ
2025年10月22日 (水曜日)本日の人気記事トップ10
今日は2025年10月22日です。
昨今、ShereHTMLでのリンク作成がここ数年メジャーでしたが、
WordPressやはてなブログにおいてはブログカードなるものが出てきました。
サイト内リンクや外部サイトリンクのサイトがカードみたいに表示されるものです。
私もWordPressをやるまでは知りませんでしたが、
いざ新しいものに手を出すと…。
なんとなくやってみたくなるのもわかる気がします。
これまでは、
今までのShereHTMLでリンク作成すれば一番安泰じゃないのかなぁ。
と思っていました。
ですが、
当ブログでもいくつかの方法でブログカードとブログカードみたいなもの(リンク先サイトのキャプチャ画像とリンク)をショートコードでできるようにしました。
以下のコードをfunction.phpに記載します。
function get_wp_screenshot($attr) {
 extract(shortcode_atts(array(
 // デフォルト設定
 'url' => '',
 'alt' => '',
 'class' => 'wpshot', // imgタグに付加するclass名
 'width' => 0, // 画像の幅(0の場合はwidthタグを出力しない)
 'link' => 1 // 0:リンクしない 1:リンクする
 ), $attr));
 if ($url == '') {
 return;
 }
 $image = 'https://s.wordpress.com/mshots/v1/' . urlencode(clean_url($url));
 if ($width > 0) {
 $height = floor($width/16*9);
 $image .= '?w=' . $width;
 $image_wh = ' width="' . $width . '" height="' . $height . '"';
 }
 if ($class != '') {
 $image_wh .= ' class="' . $class . '"';
 }
 $image = '<img src="' . $image . '" alt="' . $alt . '"' . $image_wh . '>';
 if ($link == 1) {
 $image = '<a href="' . $url . '" target="_blank">' . $image . '</a>';
 }
 return $image;
 }
 add_shortcode('wpshot','get_wp_screenshot');
そして、
ショートコードは、[wpshot url="リンクするURL" width="幅" alt="属性"]です。
[]は半角です。
こちらはサイト内リンクと外部サイトリンクではちょっと異なります。
(外部サイトリンクはちょっと難しいので次回に時間のあるときに記事にします。)
/*本文抜粋を取得する関数(綺麗な抜粋文を作成するため)*/
/*使用方法:https://nelog.jp/get_the_custom_excerpt*/
function get_the_custom_excerpt($content, $length) {
$length = ($length ? $length : 70);//デフォルトの長さを指定する
$content = preg_replace('/<!--more-->.+/is',"",$content); //moreタグ以降削除
$content = strip_shortcodes($content);//ショートコード削除
$content = strip_tags($content);//タグの除去
$content = str_replace(" ","",$content);//特殊文字の削除(今回はスペースのみ)
$content = mb_substr($content,0,$length);//文字列を指定した長さで切り取る
return $content;
}
//内部リンクをはてなカード風にするショートコード
function nlink_scode($atts) {
extract(shortcode_atts(array(
'url'=>"",
'title'=>"",
'excerpt'=>""
),$atts));
$id = url_to_postid($url);//URLから投稿IDを取得
$post = get_post($id);//IDから投稿情報の取得
$date = mysql2date('Y-m-d H:i', $post->post_date);//投稿日の取得
$img_width ="90";//画像サイズの幅指定
$img_height = "90";//画像サイズの高さ指定
$no_image = get_template_directory_uri().'/images/no-img.png';//アイキャッチ画像がない場合の画像を指定
//抜粋を取得
if(empty($excerpt)){
if($post->post_excerpt){
$excerpt = get_the_custom_excerpt($post->post_excerpt , 90);
}else{
$excerpt = get_the_custom_excerpt($post->post_content , 90);
}
}
//タイトルを取得
if(empty($title)){
$title = esc_html(get_the_title($id));
}
//アイキャッチ画像を取得
if(has_post_thumbnail($id)) {
$img = wp_get_attachment_image_src(get_post_thumbnail_id($id),array($img_width,$img_height));
$img_tag = "<img src='" . $img[0] . "' alt='{$title}' width=" . $img[1] . " height=" . $img[2] . " />";
} else { $img_tag ='<img src="'.$no_image.'" alt="" width="'.$img_width.'" height="'.$img_height.'" />';
}
$nlink .='<div class="blog-card"><a href="'. $url .'"><div class="blog-card-thumbnail">'. $img_tag .'</a></div><div class="blog-card-content"><div class="blog-card-title"><a href="'. $url .'">'. $title .' </a></div><div class="blog-card-excerpt">' . $excerpt . '</div></div><div class="blog-card-footer clear"><div class="blog-card-date">'.$date.'</div><div class="blog-card-hatebu"><img src="https://b.hatena.ne.jp/entry/image/'. $url .'" alt="はてブ"></div></div></div>';
return $nlink;
}
add_shortcode("nlink", "nlink_scode");
こちらのショートコードは[nlink url="https://infovarious.com/post-815/"]というように、
nlinkの後に自サイトのURLを記載します。
ブログカードみたいな下記のショートコードで作成した場合は、
CSSにて表示の設定をしないと綺麗に表示されません。
/*内部リンクショートコード*/

 .blog-card{
 padding:12px 12px 0 12px;
 margin:10px 0;
 border:1px solid #fff;
 word-wrap:break-word;
 max-width:100%;
 border-radius:5px;
 }

 .blog-card-thumbnail{
 float:left;
 margin-right:10px;
 }

 .blog-card-content{
 line-height:120%;
 }
 .blog-card-title{
 margin-bottom:5px;
 }

 .blog-card-title a{
 font-weight:bold;
 color:#111;
 text-decoration: none;
 }

 .blog-card-title a:hover{
 text-decoration: underline;
 }

 .blog-card-excerpt{
 color:#333;
 font-size:90%;
 }

 .blog-card-footer{
 padding-top:5px;
 border-top:1px solid #fff;
 border-top-width: 90%;
 }

 .blog-card-hatebu{

 }

 .blog-card-date{
 color:#333;
 font-size:75%;
 float:left;
 margin-right:10px;
 }

 .clear{
 clear:both;
 }
これで、
当ブログのサイト内リンクのリンク先記事が以下のように表示されるようになります。
https://infovarious.com/post-839/
アクセス増加にもデザインは結構重要です。
ユーザビリティとしても綺麗に配置されていて綺麗でシンプルな方がわかりやすいと思われます。
ただ、あまりにもユーザビリティばかり考えていると…。
昔、
私自身もハマってしまったサイト自体が重くなってしまいます。
これでは、
検索などでアクセスしてくれようとしている方々もなかなか表示されないので、
イライラしてしまったり、
なかなかサイトが表示されないのでアクセスすらしなくなってしまう可能性もなきにしもあらずです。
なので、
サイトマップGoogleへの/sitemap.xlmもプラグインは使用していません。
以前紹介したコンタクトフォームも、
Contact Form7というメジャーなプラグインは使用していません。
あとは…。
思い出した書き込みます。
でも、
これだとWordPressでもブログカードを作成することは可能ですが、
問題としてはブログカードがはてなブログを経由していることです。
はてなブログが仕様変更などしてしまうと使えなくなります。
iframeを使用しているようです。
と思っていたら…。
時流に乗り遅れているのか、
それとも、
調度よい時期にWordPressをはじめてすんなりブログカードなるものを導入できたことを喜ぶべきか…。
とまぁ、
そんなことはさておきまして…。
はてなブログカードをやめて Embedly に移行してもいいんじゃないか。公式ボタンもあるし。ブックマークレットも作った。
ちゃっかりブックマークレットだけは登録させて頂いちゃいました≦(._.)≧
ちょっと長くなりすぎちゃいました^^;。
でも、それは今は時流に乗っているとは言えないのではないのかなぁ。
なんて(*゜.゜)ゞポリポリ)
なのでとりあえず、
ということで一番いいんじゃないでしょうか。
デザインはcssでお好みのスタイルにすればいいことですしね。
ブログカードで四苦八苦されている方の参考になれば嬉しいです。
内部リンク用のブログカードの修正をしました。
以下に新たに投稿しましたので、
参考になれば幸いです。
関連記事

本日ではなく昨日になってしまいますが、それまでカーナビで地デジ対応のナビで突然エンジンをかけなおしたら・・・・・・。 「ICカードが正常に動作しませんでした。販売店にお問い合わせください。」 なんてい…
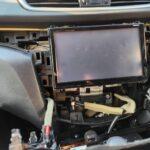
ある程度、年式がたった車においてはディーラーオプションナビ(DOP)やメーカーオプションナビ(MOP)の地図データが古くなったり、ナビのモニタインチ数が大きくなったりします。地図データが古くなるのはも…
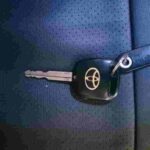
初めての経験でした。(汗)…。 キーレスエントリー、キーレスリモコンがついた鍵がエンジンを回す時にボキッと折れてしまいました。(汗)…。 プラスチックの本体部分と鉄のキー部分が分裂してしまいました。 …

 ポチップ
ポチップ  ポチップ
ポチップ 


ホワイトデープレゼントは以下などの豊富なキャンペーン商品から選ぶと良いと思います。
今週の人気記事トップ10
 ナビテレビが見れなくなった時ICカードが正常に動作しませんでした対処方法
  Windows10サポート終了後の対応やWindows11への買い替えや移行など
 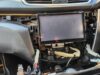 日産ディーラーオプションナビMM316D-WからMM518D-L交換(換装)NISSAN純正ナビリモコン
  カーメイトのエンジンスターターでエラー15表示と対処方法
 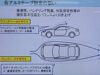 アルミテープチューン貼る場所で燃費向上と走行性能アップTOYOTAの特許を試してみた
  ECUをリセットする方法。アイドリング不安定だったのでしょうがなく
  メガネ価格破壊元祖JINSのレンズ保証期間6ヶ月に2回交換可能
  エクストレイルT32運転席側バイザーメッキモール剥がれ修復方法とオススメ両面テープ
 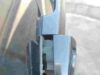 TOYOTAキーレスリモコンの設定方法とキーナンバー(キー番号)
 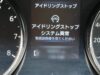 アイドリングストップシステム異常警告灯表示対処方法
 よろしかったらシェアよろしくお願いします。


新着コメント